A. Enable Deposit Module in ARMS® POS Counter
1. Login to the backend and navigate to Front End > Settings > Counters Setup.

2. Select the counter which you would like to enable the deposit module and click on .
.

3. Tick "Allow to do deposit" on the Deposit Setting and click on Save.

B. Enable cashier privilege can access deposit module.
1. Login to the backend and navigate to Administrator > Users > Update Profile.

2. Search the Cashier's Username.

3. Enable the User Privilege "POS_DEPOSIT" for the Cashier and click on "Update" at the bottom of the page

C. Allow customers to claim other branch deposits.
1. Login to the Backend.
2. Navigate to the POS Settings Option via Front End > Settings > POS Settings.

3. If accessing POS Settings from HQ, select the relevant Branch from the dropdown menu. If from Branch then skip this step and proceed to the next step.

4. Select "Allow receive deposit from other branch" with Yes.
D. How to create/claim/cancel deposit in ARMS® POS Counter
Step 2: Click on
 or
or  which in Shortcut Keys or Press Ctrl + F11 key from Keyboard to access Deposit Module.
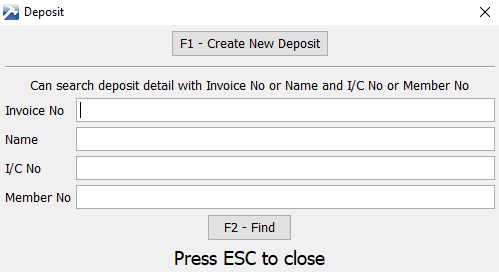
i. How to create a new deposit.
 button or press F1 from keyboard.
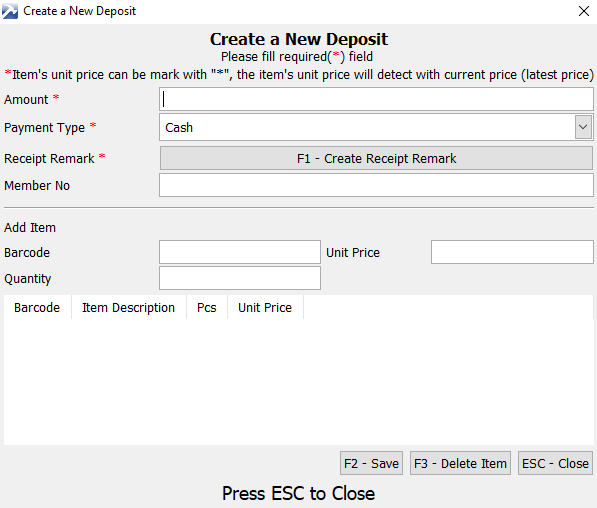
- Create a new deposit without Item.Step1: Insert Amount> The amount only allow 2 decimal and digit.> The amount value or allow 0 cent or 5 cent only.Step 2: Select payment type> 3 of payment type can select from payment type field1. Cash2. Credit Card3. Cheque> If select credit card or cheque you must to key in cheque no or credit no> Credit card no must be 16 digit or 19 digit.Step 3: Create receipt remark with press “F1” or “Create receipt remark” button.> Name and I/C is default remark. If not key in remark for Name or I/C. System will prompt error message
Step 4: Member No> Not Necessary to key in member card no- Create a new deposit with Item.Step 1: Repeat "Create a new deposit without Item." step.> *Item with price code, quantity and price will auto set the unit price & quantity*system will not allow to change quantity and price> *Item with unit code, quantity will set 1 pcs*system will not allow to change quantity.> Item is not price code or unit code, will show unit price with price after discount by promotion discount, member mprice, category discount or unit price is selling price> Item is open price item, the “Unit Price” will change “Open Price”.> Unit price and open price can be “*”. “*” is mean use latest price
Step 3: Once confirmed, click on Save or press F2 from the keyboard.
Sample deposit receipt.
Deposit Receipt without item

 or press F2 from the keyboard.
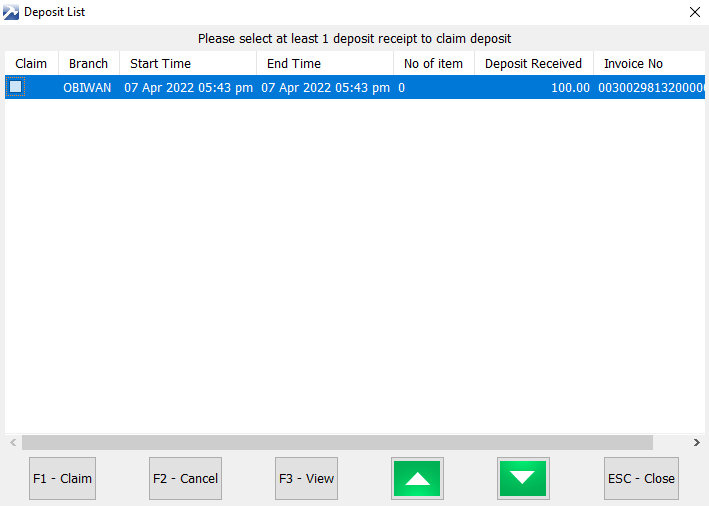
> Tick on deposit receipt checkbox which customer would like to claim.> Once confirm, click on Claim or press F1 from keyboard.> Complete transaction with payment type with Deposit.- *Cancel Deposit* Cancel Deposit receipt is not allow to cancel by other branch.> Select deposit receipt and click on Cancel or press F2 from keyboard.