* This Initial Setup Method is only available in Version Live 192 and Beta 311.
** The ARMS® POS In-App Clocking System cannot function when the PC is in Sleep Mode. Please disable the PC Sleep Mode feature.
Step 1: Run the Initial Setup Program. Note that the Windows Installer will auto-run the Initial Setup Program after install ARMS® POS.
- Windows OS: Double-Click on the "initial_setup.bat" file from the ARMS POS Folder.
- UBUNTU: Open the Terminal and type the command “cd opt/POS; bash initial_setup.sh” and paste it into the Terminal and press "Enter".
Step 2: Login into the Initial Setup Program.

Step 3: Fill in the "POS Image Server" field with the required IP Address / URL and press "Enter". Note that the POS Image Server is the User link to access the Backend Module.
Step 4: Fill in the required information in the "HQ Server" fields.
Step 5: Once complete, click on the "Next" button.

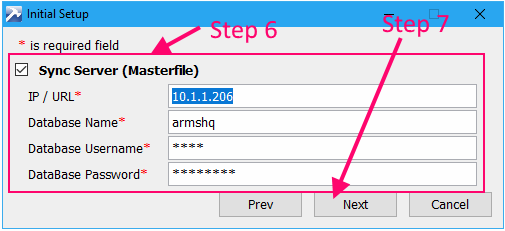
Step 6: Fill in the "Sync Server (Masterfile)" fields with the required information.
Step 7: Once complete, click on the "Next" button
Step 8: Fill in the "Sync Server (Sales)" fields with the required information.
Step 9: Once complete, click on the "Next" button.


Step 10: Select the required Branch Code and Counter Name from the drop-down menus. Click on the "Setup" button once completed.
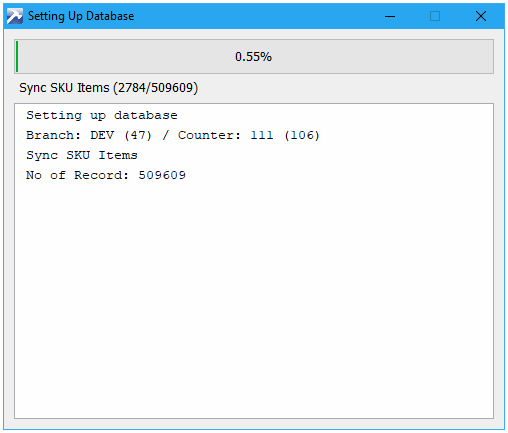
Step 12: Wait for Installation to complete. If the installation is successful, the System will display a message as per below:

** IMPORTANT:
- Please contact the ARMS Implementation Team for any Server / Sync Server Database Information or any Username and Password prompts.
- The Sync Server (Masterfile) and Sync Server (Sales) fields are not a compulsory customer requirement, and can be skipped. To skip, untick the checkbox and click on the "Next" button.
- An exclamation mark (!) will be displayed beside the text box if the System fails to connect to the Server. Reasons the System may fail to connect to the Server include:
- Counter Network Is Down
- Server Connectivity Is Down
- Incorrect Values Entered
If the below Error Message is encountered, navigate to Counter Setup, via Front End > Settings > Counter Setup, and click on the "Reset Counter Status". Note that the User Privilege [COUNTER_ALLOW_UNSET_STATUS] is required.
